Make-A-Quilt Weekend – Follow up

Make-A-Quilt Weekends #1 & 2 Follow up
 
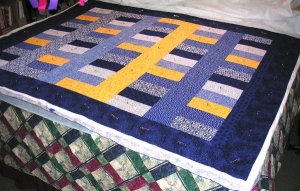
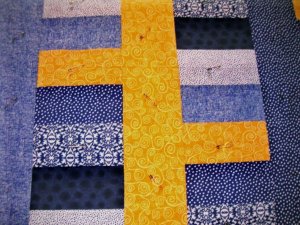
I finally got a couple of pictures of the Quilt I made in 2 Weekends for M’s Mother.

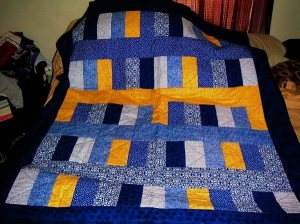
Stretched out on our King-sized bed, it covers the pillows and extends down to the end of the mattress.

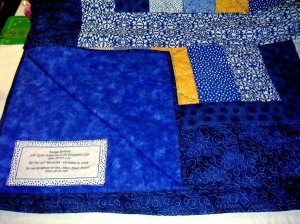
The back is a blue marbled flannel adding to the warmth and hopefully will help keep it from slipping.  To commemorate the Quilt and her Birthday, I’ve added a label that has her name/my name and her birthdate.

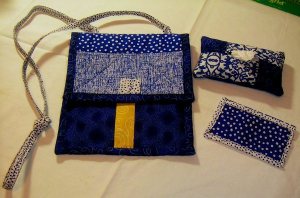
But what do you do with leftovers after making a quilt — you create matching accessories!

I made a small purse/carry-all, a tissue cover and an ID case.  The purse has one pocket in the front covered by a velcro’ed flap and an ‘open’ pocket on the back.  The ID case has a clear pocket for her id and a hidden pocket for whatever!

Posted in Hobbies | Leave a comment

Make-A-Quilt Weekend #2

Monday, Day #7 of Make-A-Quilt Weekend – Part #8
 
OK, It’s Done!  Now to be honest, it took 2 Weekends — and to be more exact, it took 7 Days (not counting a day of shopping).
 
Today I completed & attached the Label, and stitched the Binding.  It is too dark now to get a good picture, so we’ll take pictures tomorrow
Posted in Hobbies | Leave a comment

Make-A-Quilt Weekend #2

Sunday, Day #6 of Make-A-Quilt Weekend – Part #7
 
I’ve decided that I enjoy Piecing the Quilt Top more than Quilting the Quilt.  When Quilting a Quilt that is larger than crib-size, it turns into a wrestling match!  There is soooooo much fabric, and with 3 layers (top-batting-backing) it is thick.
 
So, today has been a wrestling day!  I’ve had to wind the bobbin 4 times and nearly ran out of thread all-together!  Plus I broke a needle.  But I basically have the Quilt Quilted — YEAH!!!!!!!!!  And I only had to rip out 8" of stitches — I got twisted and stitched a part of a block wrong.
 
I’m taking a break – M’s cooking hambergers on the grill and did BBQ Beans for dinner. 
 
I need to finalize the Quilt Label and print it so I can stitch it to the backing before I baste the edges.  Don’t know if I’ll do much more today, but only have the label, trimming the excess batting/backing & stitching the binding on (actually that’s done 2x – once to the back, fold it over and another time on the front.)
Posted in Quilting, Quilts, Uncategorized | Leave a comment

Make-A-Quilt Weekend #2

Saturday, Day #5 of Make-A-Quilt Weekend – Part #6
 
In case you haven’t figured it out yet, I really haven’t been able to make this quilt in just ONE weekend!  So, to continue, yesterday I finished adding the Borders to the top, and washed the flannel backing fabric.  The Finished Top is 56" x 72".
 
Today, I have cut the backing fabric in two pieces, trimmed the selvages and stitched them together making a larger than necessary backing (62" x 80").  The backing and batting are always cut a bit larger to allow for ‘shrinking’ when the quilt top is quilted.  The more stitching done to quilt it, the more ‘shrinking’ happens.  I don’t plan on ‘over-stitching’ the quilt, because I want it soft & cuddly.
 
I have also pieced the binding strips into one very long piece and ironed it WST (Wrong-Sides-Together).  You do not bind a quilt until AFTER you quilt it, so this is just set aside for now.
 
Next I created my "Quilt Sandwich."  First lay the backing fabric down, wrong-side up & smooth out the wrinkles.  Then add the batting, smoothing out any wrinkles.  Finally, lay the top, right-side up and center on the batting/backing.  Keep smoothing out wrinkles.
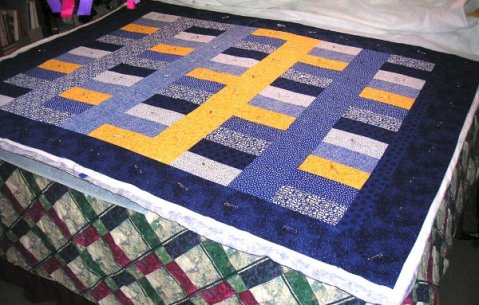
Once the Quilt Sandwich is made, but before stitching, I have Pin-Basted the pieces together to keep them from shifting.  You can baste with spray adhesive, or you can hand or machine baste, or you can baste with pins.  I don’t really care for the spray, although I do use it sometimes — it is messy, you get sticky stuff on other things than where you need it and it doesn’t always keep it from shifting.  Hand basting could take a lot of time, but you have to rip it back out once you’ve finished quilting.
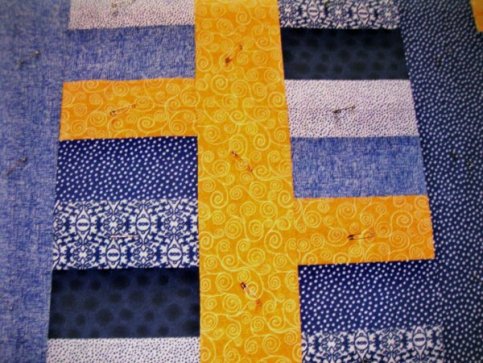
Taking a break to have lunch, and then will get to Quilting!
Posted in Hobbies | Leave a comment

Make-A-Quilt Weekend #2

Saturday, Day #5 of Make-A-Quilt Weekend – Part #6
 
In case you haven’t figured it out yet, I really haven’t been able to make this quilt in just ONE weekend!  So, to continue, yesterday I finished adding the Borders to the top, and washed the flannel backing fabric.  The Finished Top is 56" x 72".
 
Today, I have cut the backing fabric in two pieces, trimmed the selvages and stitched them together making a larger than necessary backing (62" x 80").  The backing and batting are always cut a bit larger to allow for ‘shrinking’ when the quilt top is quilted.  The more stitching done to quilt it, the more ‘shrinking’ happens.  I don’t plan on ‘over-stitching’ the quilt, because I want it soft & cuddly.
 
I have also pieced the binding strips into one very long piece and ironed it WST (Wrong-Sides-Together).  You do not bind a quilt until AFTER you quilt it, so this is just set aside for now.
 
Next I created my "Quilt Sandwich."  First lay the backing fabric down, wrong-side up & smooth out the wrinkles.  Then add the batting, smoothing out any wrinkles.  Finally, lay the top, right-side up and center on the batting/backing.  Keep smoothing out wrinkles.

Once the Quilt Sandwich is made, but before stitching, I have Pin-Basted the pieces together to keep them from shifting.  You can baste with spray adhesive, or you can hand or machine baste, or you can baste with pins.  I don’t really care for the spray, although I do use it sometimes — it is messy, you get sticky stuff on other things than where you need it and it doesn’t always keep it from shifting.  Hand basting could take a lot of time, but you have to rip it back out once you’ve finished quilting.

Taking a break to have lunch, and then will get to Quilting!
Posted in Hobbies | Leave a comment